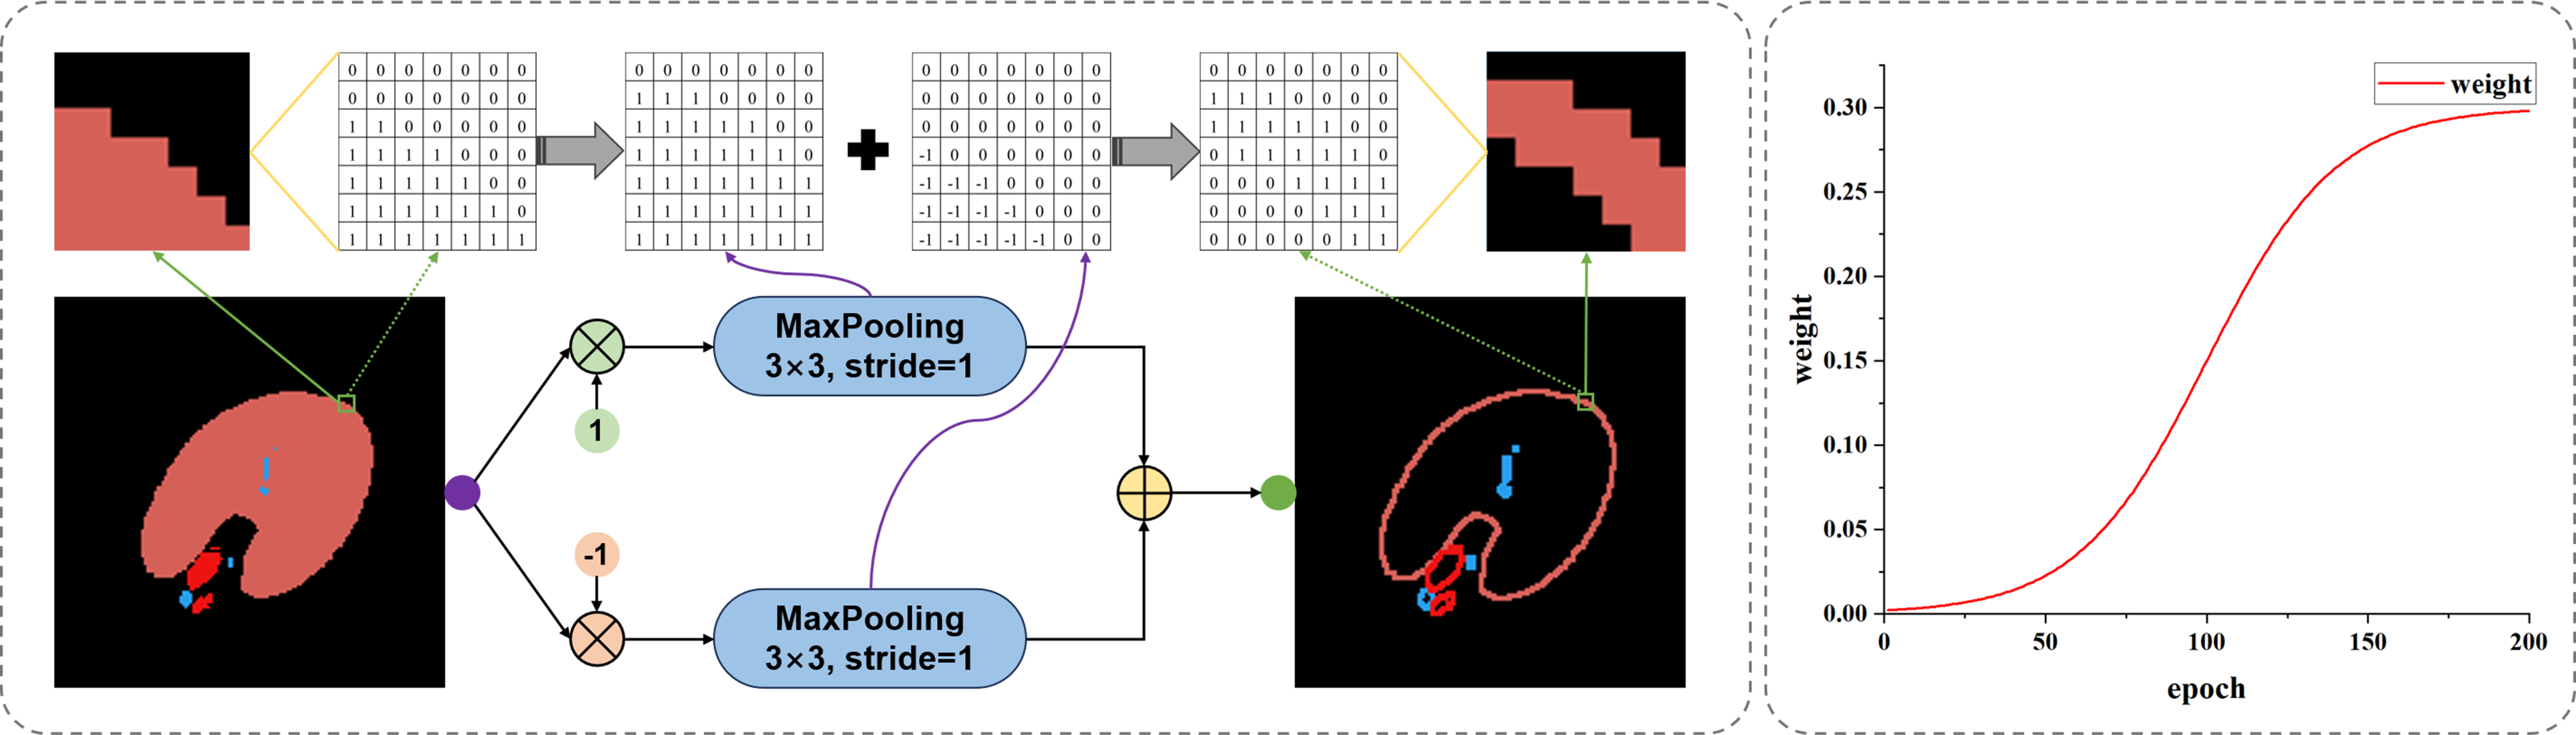
Figure 7. The schematic diagram of contour loss and its weight strategy.
All published articles are preserved here permanently: