
fig4
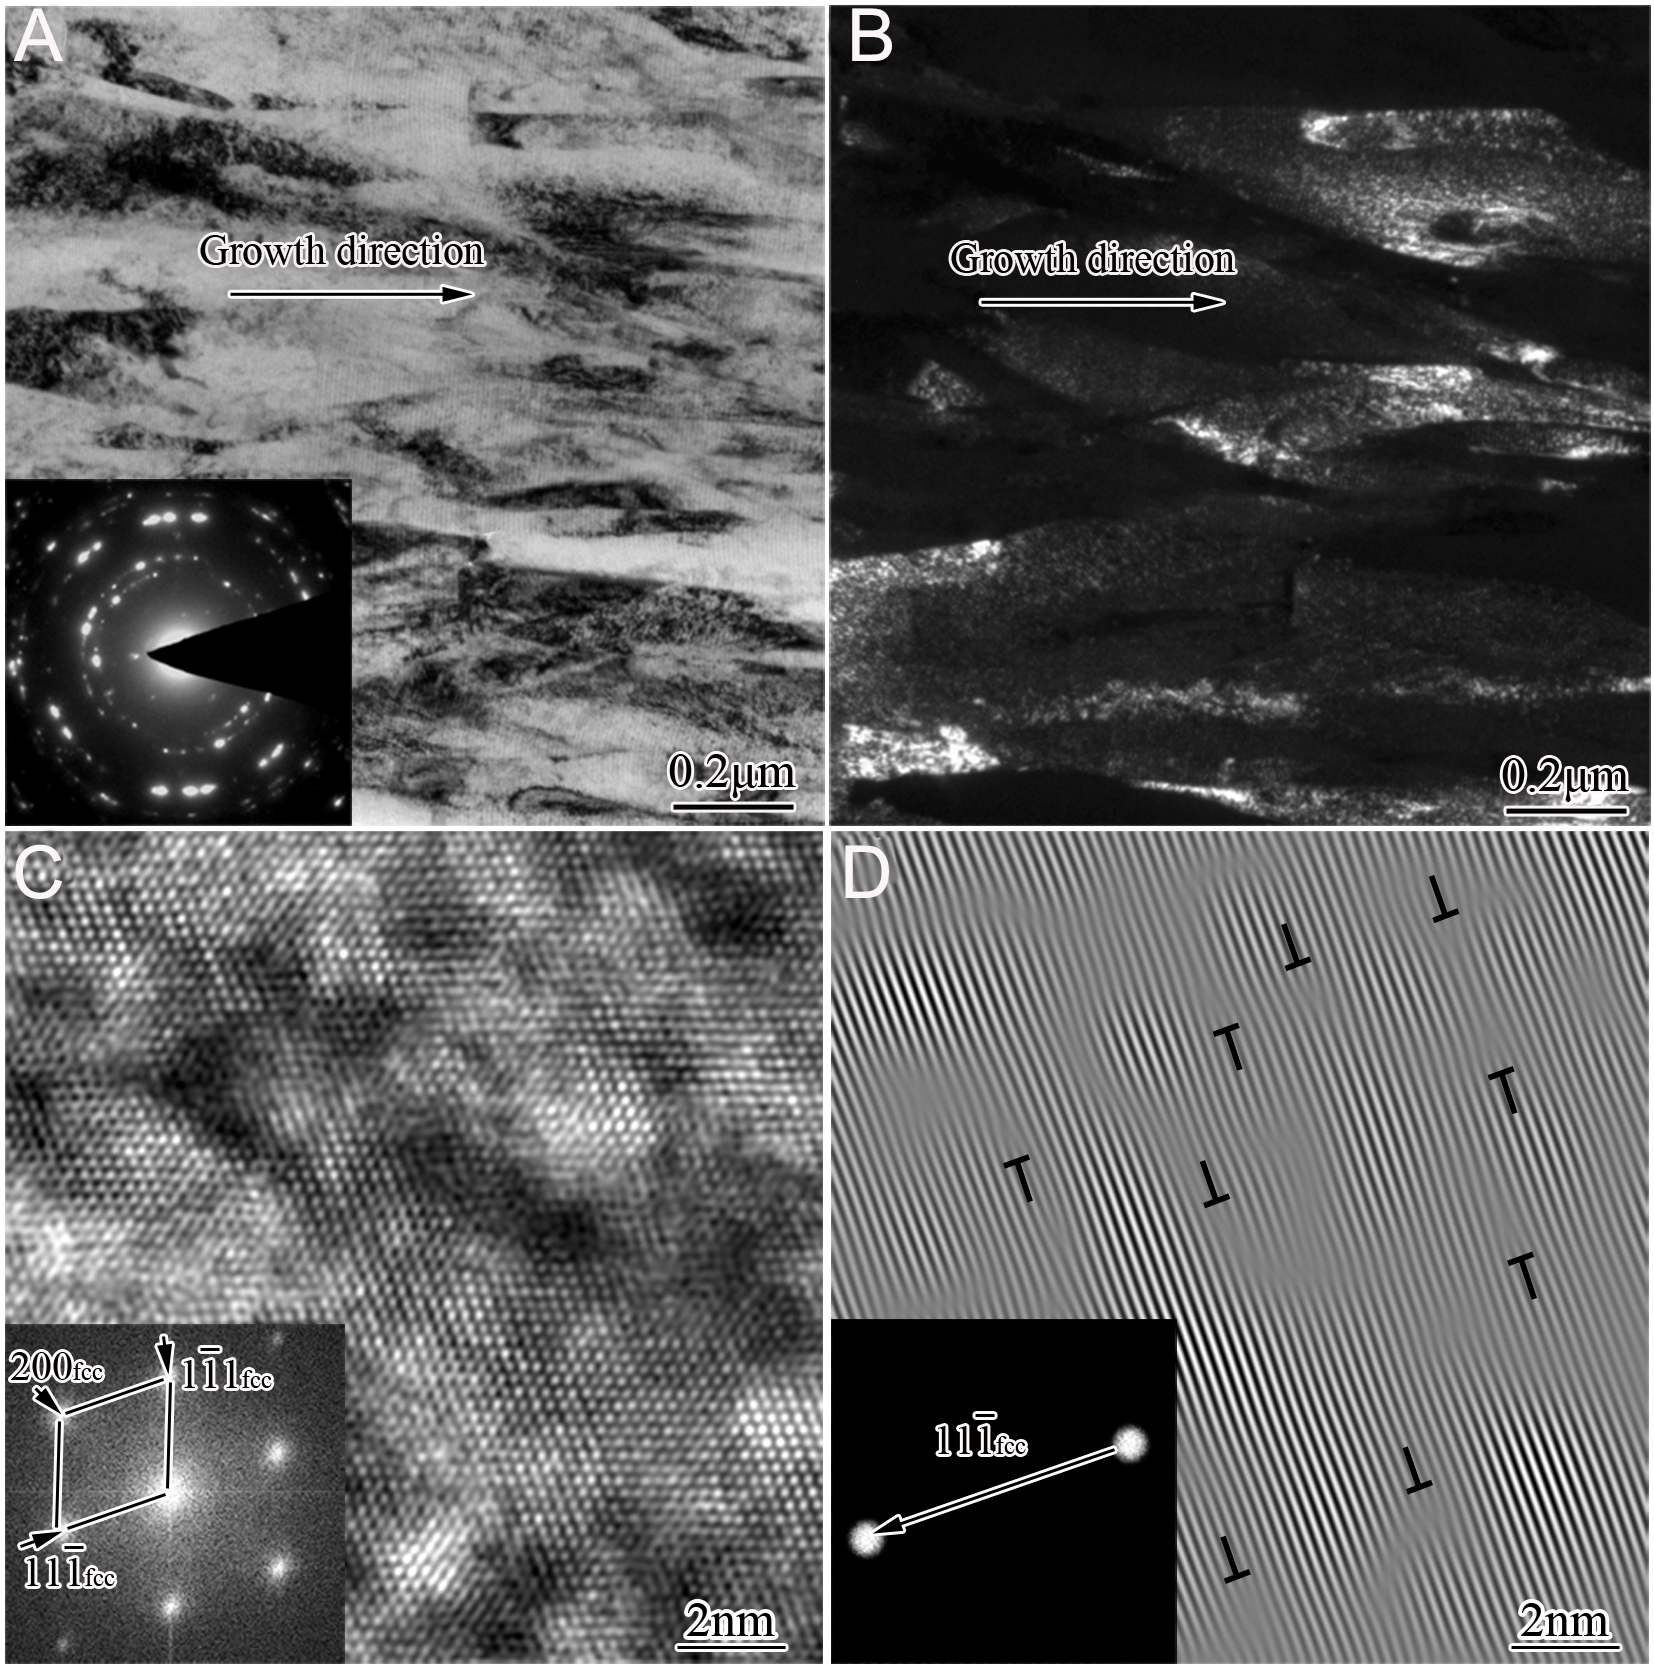
Figure 4. Cross-sectional TEM and HRTEM images of the as-deposited No. 3 sample: (A) Bright-field image with corresponding SAEDP; (B) CDF image viewed along the g = 200 reflection; (C) HRTEM image with corresponding FFT; (D) IFFT image viewed along the g = [111] direction.